Archive | Garden Planning RSS feed for this section

Urban Farmscape: Florida Style

21 Oct

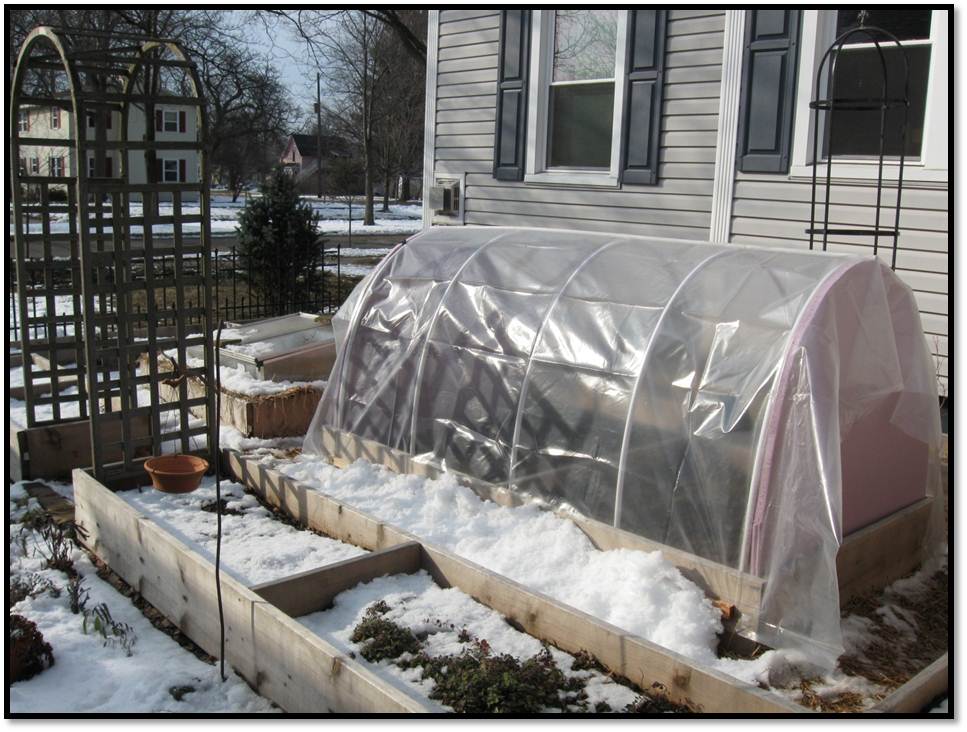
Just because gardening season in Michigan is about to end, it doesn’t mean that I will stop gardening.  Like I said in previous posts, my mind is always in the garden.  Not because I want to dig in the dirt, but mostly because I love nature and the beauty it offers.  I feel in total awe and hold a true appreciation for how plants grow, providing us with their delicious fruits, roots, and leafy flavors!  I guess I mostly garden for the love of food.

I took a long weekend trip to southern Florida to visit my daughter and her family.  I thought I was taking a vacation from the garden, enjoying the sun, a little swimming, playing with my granddaughter.  Both  my daughter and son-in-law work and don’t have much time for gardening, but wanted to offset the cost of their grocery bill by trying to grow more of their veggies.  Today, my daughter wanted to plant her garden.   She had already bought seeds and started some plants in peat pots. She had been gardening in containers and decided it was time to expand her growing space.  Now is the time to plant in Florida, so we headed to the local box store to buy lumber, topsoil, and a few other supplies to make a veggie garden.

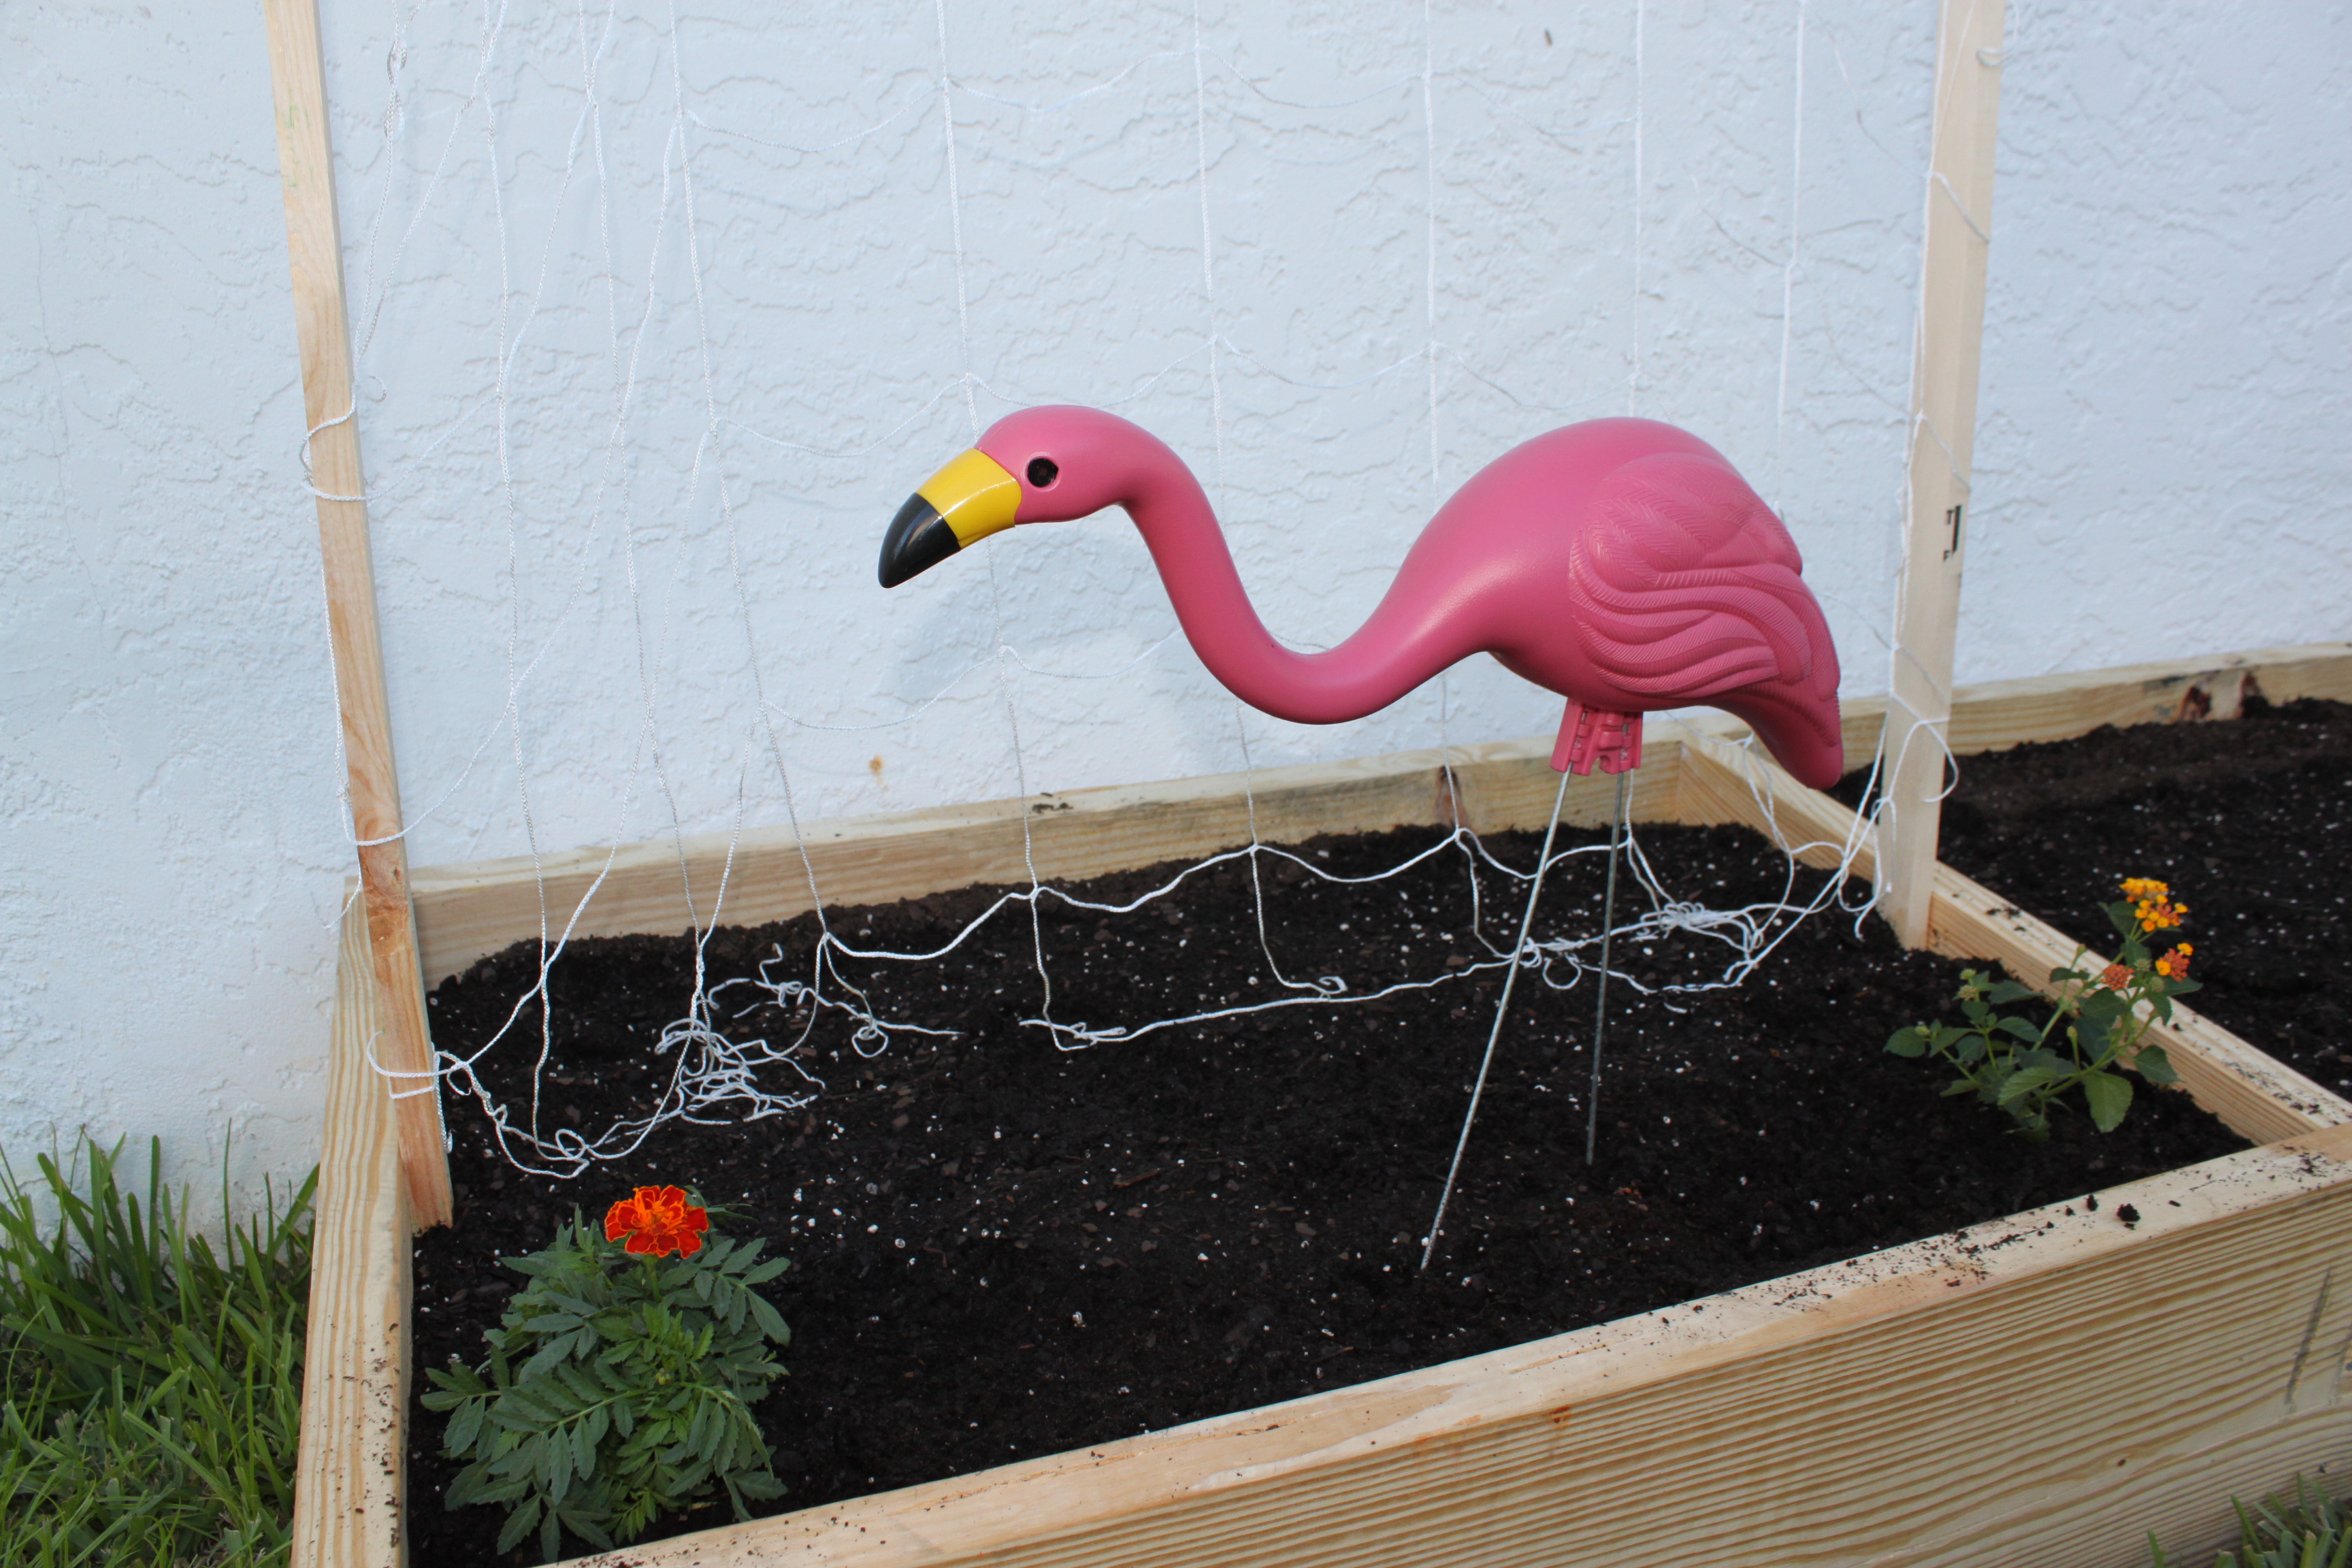
After following directions from the post I wrote on March 18, 2012 Contained Chaos, my daughter and her husband decided on the best location to build their raised bed.  The morning is the sunniest on the southeast side of their house and it is totally shaded by 2:00 p.m.  Perfect for Florida when the afternoons are really too hot.  This will be good for working in the garden later in the evening with their daughter.  It didn’t take long before my son-in-law had the bed put together, trellises up, and then both he and my daughter filled them up with topsoil and potting mix.


They planted pole beans, zucchini, and cucumbers today as time was running short.  My granddaughter planted the plants she picked out this morning, along with a little tropical bird she fell in love with that adds a little garden whimsy.  Ha!  My daughter said she would never have one in her yard.  Funny what parents (and grandparents!) do for their kids.  There should always be a little fun in the garden.

It was a good day building and planting as a family.  Now I will go home to Michigan, where the leaves have probably fallen off the trees, and where I will finish some garden chores, pruning, cleaning and putting away my garden tools.  Next time I visit my daughter and son-in-law may be around the holidays, when I will expect fresh green beans for dinner!  As well as the amazing risotto that she makes.

Have you planted your garden yet?

Building a Cold Frame

16 Sep

I was driving around northern Michigan today and noticed some of the leaves starting to change color. Then I realized that with the first frost date rapidly approaching, it was time to think about protecting my garden. Plants such as basil and peppers won’t tolerate temperatures below 50 degrees Fahrenheit let alone a frost. I suddenly felt the urgent need to harvest everything before it was too late.

You can extend your growing season long into the fall, maybe into winter in a small unheated greenhouse or cold frame for some crops such as carrots, beets, spinach and arugula. Remember how early spring came? I got so tired of covering and uncovering plants. Hot, cold, hot cold. Well, nighttime temperatures are what you need to pay close attention to now, and the covering and uncovering is about to start again. If it is going to dip down below that magic 50 degrees, protect your warm season vegetables like tomatoes which can tolerate an occasional dip, but then you will start to notice how the fruits stop maturing and they aren’t turning red. Best to pick them and make some fried green tomatoes. If you want to seriously continue to garden and save what you can, you can build a simple cold frame. WARNING!!! You can now cook your cool season crops on a sunny day. So not only do you need to keep them warm at night, you need to keep them cool on a sunny day. For now, protect with newspaper or lightweight fabric such as a frost cloth which is available from Johnny’s Selected Seeds. Protect this way on these occasional frosty nights, and prepare for colder temperatures by building a simple cold frame like I did here.

I cut 1/2 inch PVC pipes 10 feet long. Since my beds are raised it was easy to push them into the ground on one side. The bed that I am working on is 4 feet by 8 feet. I have equally spaced 5 PVC pipes (you only see part of it here).

I bent the PVC around and pushed into the ground on the opposite side of the bed.

I secured the PVC to the inside of the raised bed using this galvanized piece.

Then I used zip ties to secure an 8 foot pipe to the top. I would recommend adding a screw to prevent it from sliding down the sides.

Cover with poly. Here I used a horticultural grade poly that I had left over from a greenhouse we built at our farm. You can buy this at greenhouse supply companies or catalogs like Farm-Tek. More light penetrates, which is important for plant growth and development.

Notice how transparent it is.

This was an inexpensive alternative using painters plastic from the hardware.

For finishing touches, you can use scrap pieces of wood screwed to the bed frame to secure the poly at the bottoms. I used pink foam insulation pieces for the ends to make it easier to remove on sunny days to prevent the temperatures from getting too high.

This was the simplest and most inexpensive way that I came up with to make a cold frame. There are many other options to explore whether you want to protect your crops, extend your season, or get a jump on next year. Click on the Grow Veg link to the right, or below on the links to go to Amazon for my favorite books to learn more. Or the last link to a Juwel Cold Frame like the one you see in the background of the above picture. This is one of my favorite cold frames. Just ignore the snow for now. We still have a lot of time before that gets here.

Four-Season Harvest: Organic Vegetables from Your Home Garden All Year Long

The Year-Round Vegetable Gardener: How to Grow Your Own Food 365 Days a Year, No Matter Where You Live

Juwel Cold Frame 1000

Starting Seeds Indoors

19 Feb

Seeds germinate easily with a little help by providing the proper growing media, container, water, temperature, and light.

  1. Growing media for seed starting is what you plant your seeds in.  Think dirt, but it’s not dirt.   It should be fine in texture but most of all it should be sterile.  You can find several seed starting mixes out there but I have had the best luck using “No Damp Off” by Mosser Lee.  Simply, it’s a finely milled sterile sphagnum peat approved for organic growing.  A little goes a long way.  Avoid breathing in this light and airy peat.  Seeds carry all of the necessary nutrients to get them started so don’t be fooled by those with a lot of unnecessary ingredients such as fertilizers and wetting agents.   Most of these have not been approved for organic growing.
  2. It doesn’t really matter what type of container you plant your seeds in as long as it is shallow.  I use a lot of recycled materials that have been disinfected in a solution of 1 tablespoon of bleach to 1 gallon of water.  Plastic egg cartons, plastic veggie containers and some of the oven or microwave containers work well.  They only serve as a vessel to hold the growing media, seeds, and water for a short time.  Make sure they have drainage holes.  I use a 20 row seeder when I am sowing a lot.  These individual rows provide dividers when I want to sow several different seeds and it only takes up the space of a flat.
  3. The growing media needs to be kept moist.  I water from the bottom of the drip tray (the tray underneath the container) and allow the water to soak up.  I then spray the top with a spray bottle after sowing the seeds.  I’ll use the spray bottle daily to mist and keep the media evenly wet.  You can use a clear plastic dome that will increase humidity and prevent from drying out as quickly, or regular plastic wrap works well, but is a pain putting it on and off. 
  4. The soil temperature is more important that the air temperature.  Each seed has an optimum temperature for germination.  Detailed information can be found in the book The Seed Starters Handbook  by Nancy Bubel or in Knott’s Handbook for Vegetable Growers, Fifth Edition by Donald N. Maynard and George J. Hochmuth .  Odds are, in your home, if the temperatures are 70 degrees, the soil media in your little germination trays will be 70 degrees.  If you grow in the basement, like I do, it’s a little cooler, so for some veggies, like peppers, I will use a heat mat to increase the temperature allowing for improved germination.  Keep in mind that when seeds are germinated at their optimum temperature, you will see a more even, improved, and quicker germination.  Items such as this Germination Station with Heat Mat from Hydrofarm work great.
  5. Your seedlings will emerge at different rates.  You will notice the stem first, arching like a sea serpent with leaves to follow, roots beginning to anchor in the soil.  Within a day or so you will see little plants reaching toward the light with their cotyledon leaves.  At this time any plastic should come off and the lights should go on.  The cotyledon leaves are the leaves which hold all of the nutrients necessary for the plant to start growing.  The next set of leaves are called the “first true leaves”, which means exactly that.  Once this set of first true leaves unfold  the plant really starts growing and now is the time to transplant these new seedlings into larger containers or cell packs.  It is important to keep the lights on for 12-14 hours to allow for proper photosynthesis and to avoid stretching.  Providing proper lighting will encourage shorter, compact plants reducing that “leggy look”.  Even if you have a very sunny window sill, you will benefit by providing supplemental lighting for healthier plants.  For seed starting, full spectrum fluorescent bulbs work best.  These are available in many shapes and sizes.  The Two-Foot Grow Light from Hydrofarm fits well in most spaces.  If you have more room, this Four-Foot Grow Light will have enough space to grow two flats.  You will notice soon that the cotyledon leaves will dry up and fall off.  That’s normal so don’t worry!

Not all seeds require starting indoors, and some may only need to be started a couple weeks before planting outside.  I love starting seeds.  It gives me the option to grow so much more than what is available at the garden centers.  If you are hesitant about starting seeds, just try one new thing this year.  You may be surprised!


Click on the links above and below for more information on seed starting supplies!

 Hydrofarm CK64050 Germination Station with Heat Mat

 Growers Supply Company GS2211-4 4-Pack 22-by-11-by-2-1/2-Inch Perma-Nest Plant Trays, Green

 5 Pack of Durable Black Plastic Growing Trays (with holes) 21″ x 11″ x 2″ – Planting Seedlings, Flowers, Wheatgrass

Online Garden Planning Tools

12 Feb

There are several online tools available that would help make your garden planning easier.  You can find some for free; others are available for a small cost.  Play around with the free offers before you buy to make sure that the program will do all of the things that you want it to do.  The free planning tools may be good for a simple layout but the more involved you get with your garden, the more you should expect the planning tool to do, which may come at a cost.

Last year I used the Kitchen Garden Planner from Gardener’s Supply Company.  It was free and allowed me to plan rows any size or width.  There are 50 crops to choose from.  You can create an account and save your garden information on their website or print it out.  They also offer pre-planned gardens for you to follow which might be the best choice for a beginner.  This planner works well to get a general layout for a new garden.  http://www.gardeners.com

Vegetable Garden Planner is free and has more to offer.  You must register to become a full member giving you the ability to create your garden, a journal, upload photos and keep track of your information.  They also have smart phone apps.  I downloaded the app for my iPhone which provides a lot of plant and gardening information.  What I found most interesting and useful was the “Family Feeder Calculator”.  You can select a “vegetable”, “herb” or “rare”, and then how many people are in your family, and it tells you how many plants to grow.  I chose from a drop down menu two people in my family and then selected pole beans for the crop to grow.  The recommendation I was then given was to plant 40 plants! Most experience gardeners know that bean plants produce a lot of fruit so would make an adjustment, but for a beginner, you may become known around your neighborhood as the bean person, which might not be all bad if you are really into beans.  There is mention on the bottom of the page that it does now account for succession planting.  Up to 90 crops are available with this program.  http://www.vegetablegardenplanner.com

            The Interactive Vegetable Garden Planner from GrowVeg is what I will be using this year.   Go to GrowVeg.com  and sign up to use the 30 day free trial and if you like it, you can purchase an annual membership for $25.  With this program you can plan your garden to the inch or chose metric measurements if you like.   You have the option to design your garden using traditional rows or by the Square Foot Garden method.  I will go into further detail about the Square Foot Garden method in a future post.  I use a lot of this in My Urban Farmscape.  The program can select from 5000 geographical locations which will allow your garden plan to be specific to your growing region.  This is important because different regions will grow and plant different plants.  GrowVeg will e-mail you updates for planting reminders based on our growing region twice a month.  What!  Once the gardening season is in full swing, I am so busy, I could use all the reminders I can get!  You can select from 130 vegetables, herbs and fruits.  They even provide information regarding crop rotations and warns you when you are about to place a crop in a location that might not be suitable based on last year’s plan.  This is important in order to prevent diseases and deter pests that may harbor in your garden from the previous year.  You can undo, copy and paste allowing you to create and re-create your gardens.  I’m sure that once you get started, you will love everything GrowVeg does.  When your garden is all designed, you can click on the plant list button to get your complete list of plants and quantities.  Awesome!  All you need to operate the program is Adobe Flash Player.  Try it free for 30 days and you will probably be able to plan your initial garden in that time.  But gardening doesn’t end in 30 days and neither does garden planning!  It will be worth the twenty five bucks to become a member.  GrowVeg has just launched their version for the iPad and expect their iPhone version be available toward the end of the year.  I draw and sketch my gardens initially,  then I finalize with a digital plan using all the tools and resources available to me to ensure a successful planting and growing season.  It’s almost time to start planting so finish up your planning with your favorite online garden planning tool.  Be sure to check out GrowVeg!

Online Garden Planning Tool

Where Does Your Garden Grow?

29 Jan

Whether you are a first time gardener or a master, a lot of planning is necessary to ensure a successful garden. So…First things first. Where is your garden going to be? A great goal would be that your whole yard becomes your Urban Farmscape, but that could be a huge task, so it’s best to start small. A side yard, your front yard, the space outside your kitchen door, or maybe  your front porch or back deck. Wherever it is there are a few things you need to do before you select plants. You will have to go outside for this so bundle up! I love to go out when the sun is shining brightly on the snow, which isn’t very often in Michigan but when it does, it’s amazing. Especially after a fresh snow when the lawns are covered with sparkling diamonds and bushes look like sugar frosted cupcakes. Nice! Okay… back to planning. Once you decide where your garden will be, do the following:
1. Measure the area and make rough sketches.
2. If you have a camera, take a lot of pictures.
3. Think about how you will be planting your plants, directly into the soil, containers, or maybe you would like to build a raised planter.
4. Sketch your garden space onto a piece of paper or graph paper. Be sure to include the location of your house, shed, fences, water spigots, and existing plants or trees. When you think you have all the information you need, you can draw a more detailed drawing (inside the house). Use a thicker point marker to outline buildings, and a thinner tipped one for everything else. Color if you like. Name buildings (house, shed etc.). Add proposed garden beds using pencil again, or a fine tip marker. If you are planning a container garden on your deck, then draw to scale your deck and where the containers will be placed. Be sure to include furniture or grills. Make notes of the actual growing space you have in square feet. For example, a 12 inch container would be 1 square foot. A garden that is 2’ x 8’ is 16 square feet. This is helpful for future reference when deciding what to plant, adding soil amendments or fertilizers. Don’t worry; I’ll talk about these soon.
5. Locate and draw a symbol for North in a lower corner. A capital “N” with an arrow pointing toward the north is typically how this is done.
6. In the opposite lower corner, write down the scale you are using. For example, if one square = 1 foot, then write that.
7. Give your garden a name and write that at the top of your page.
8. Now, observe the sun for a few days in your proposed garden space. For most fruits and vegetables, a minimum of 6-8 hours is needed but full sun is preferred. Herbs thrive in hot sunny places. Keep in mind the sun is lower in the sky during winter and that a southern exposure today may be shaded by neighboring buildings or trees, but as the sun moves higher into the sky, the area may become blasted with sunshine before too long.
These are the first steps in your design. What to plant where is soon to come. Stay tuned as I evaluate and share my thoughts on some computer related garden planning tools that are fun and will help you create your Farmscape!

%d bloggers like this: