Funky Pumpkin Totem

7 Oct

It’s October and it’s pumpkin time!  Not only do I love to eat everything pumpkin, I love decorating with them.  Not the traditional carving the Jack-O-Lantern type of decorating like when the kids were little, but finding the most unique pumpkins and gourds to decorate my front porch with.  Needing an inspiration piece, I decided to create a totem of pumpkins and set out on a journey to find the funkiest pumpkins around.


Roadside stands are one of the best places to start.  Here my daughter and I found these nice white pumpkins.  Definitely a keeper. 


I LOVED these variegated white, green and orange pumpkins.


Hearty Harvest in Remus, Michigan

With a selection like this, who needs to go anywhere else!


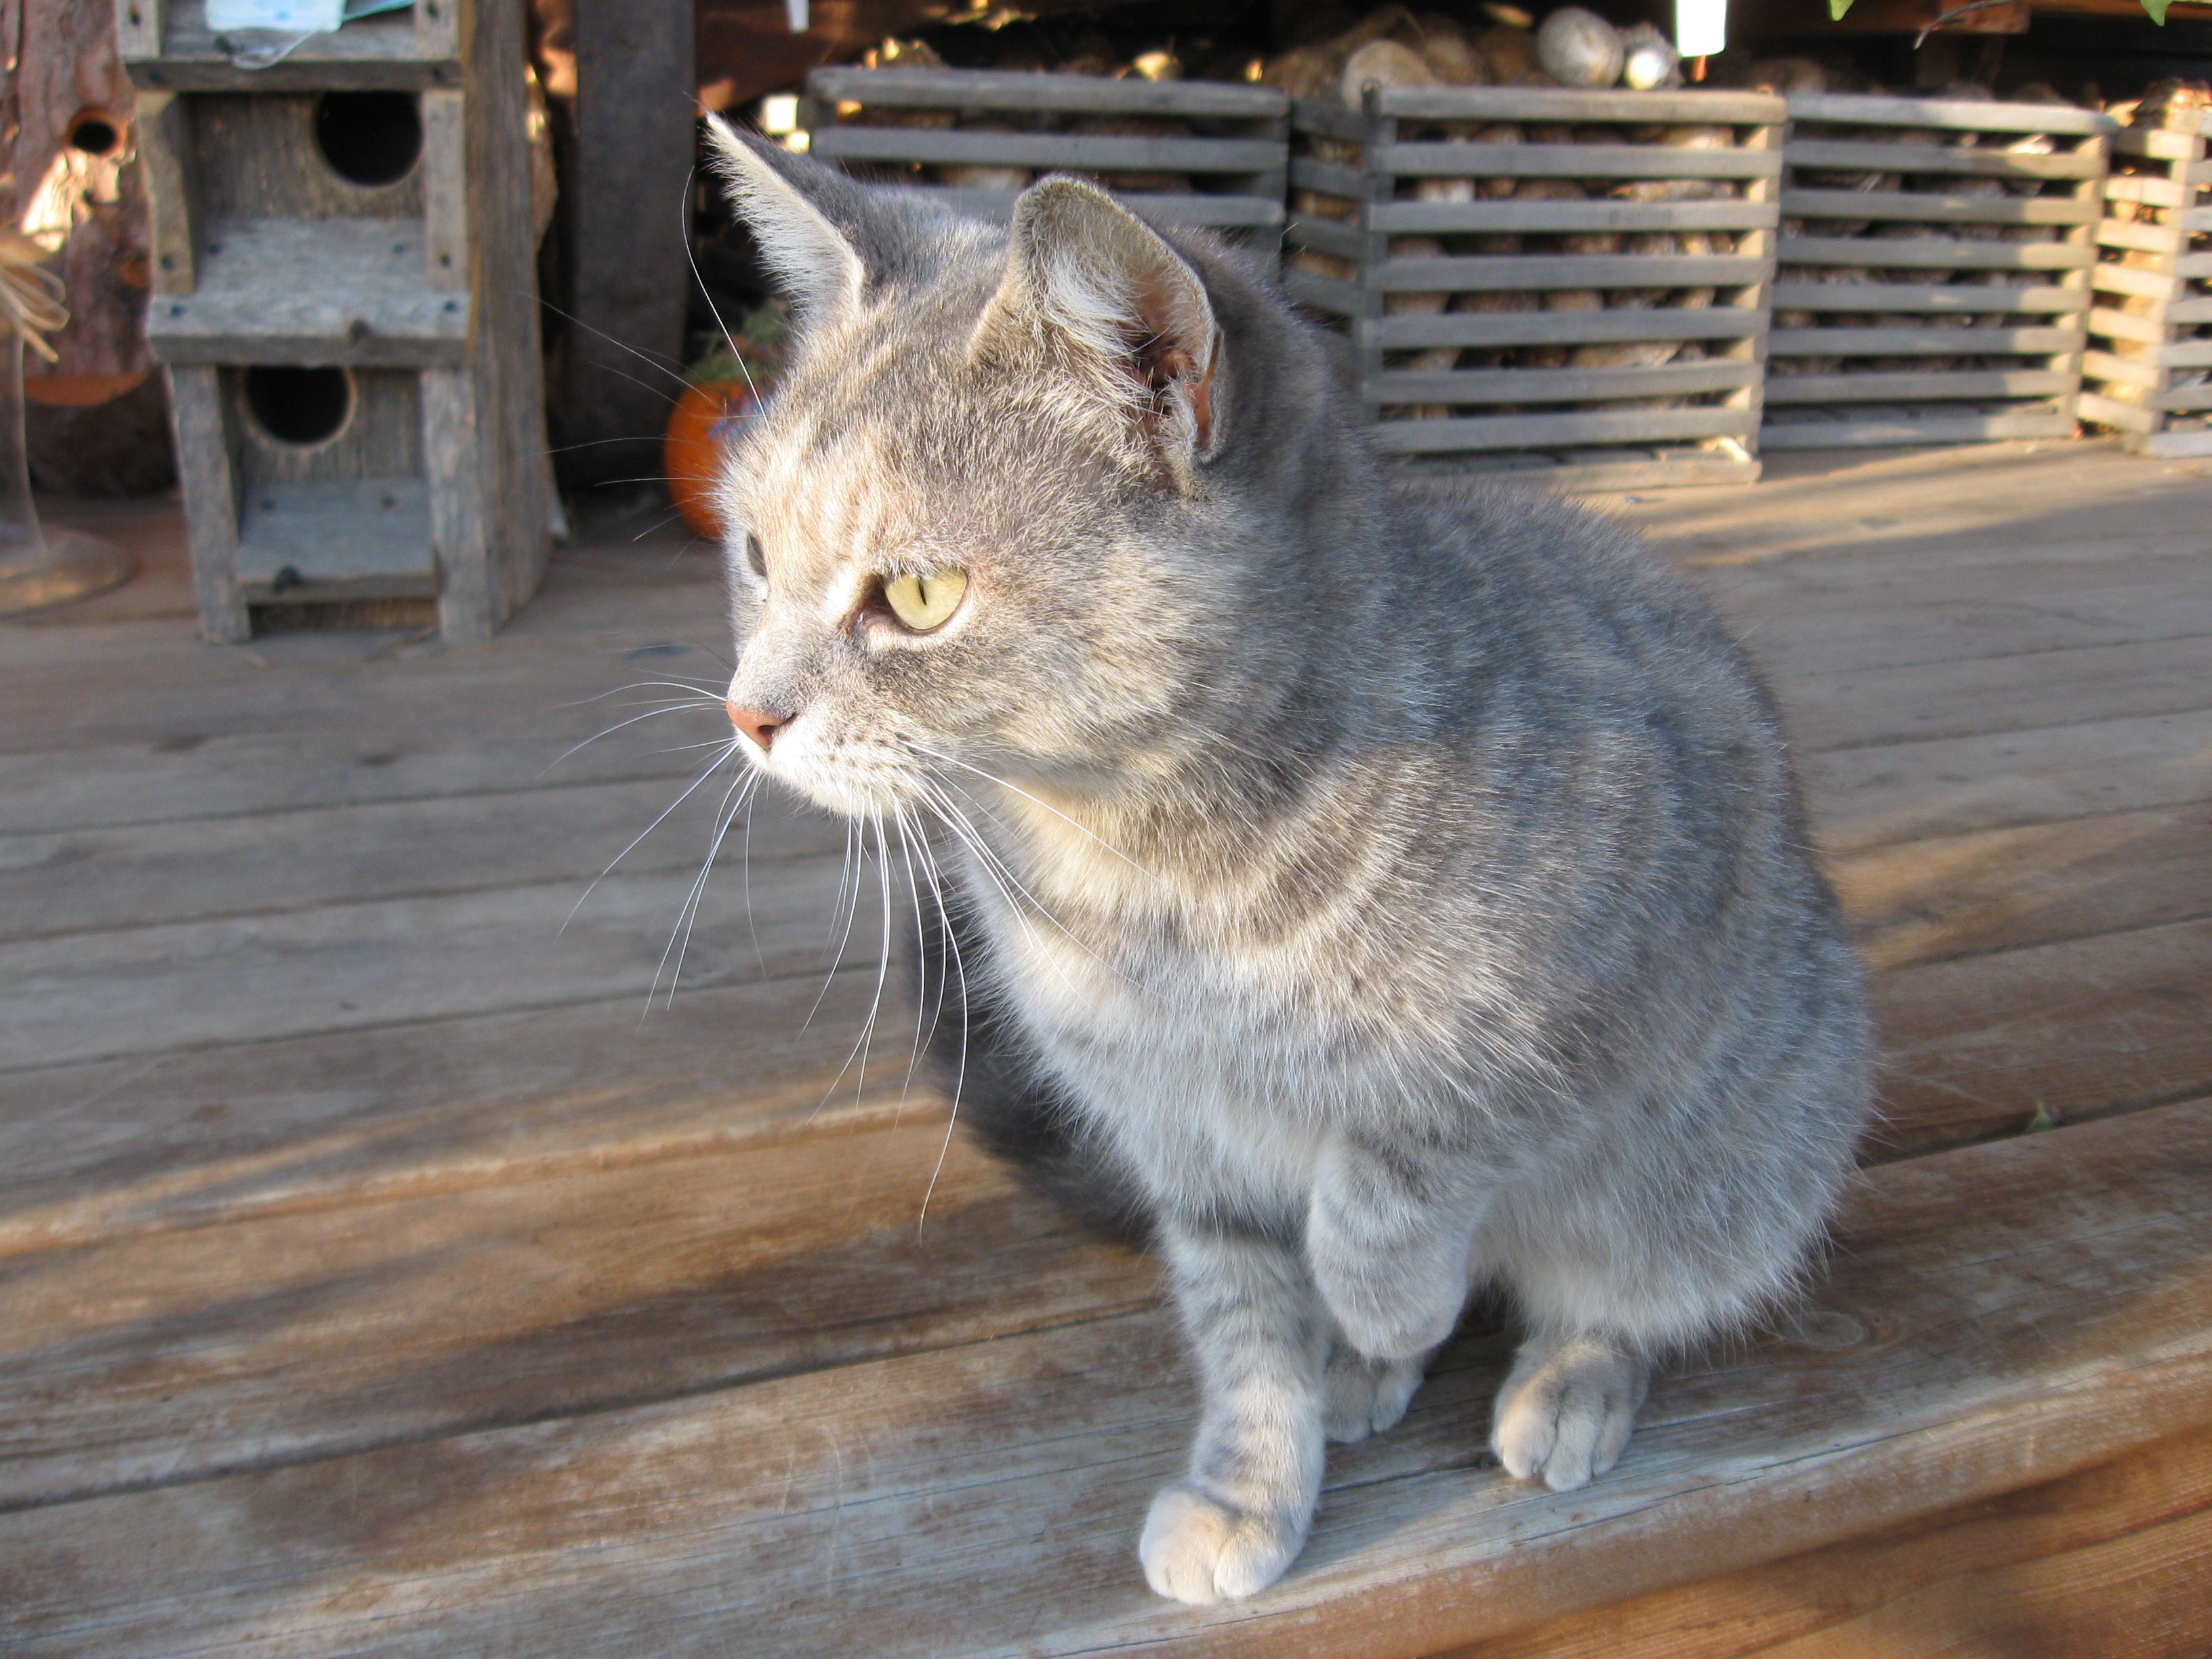
I thought the cat would be a nice touch to my autumn decorating, but she wasn’t for sale. 


A swan and her babies maybe? 


Once we got a nice selection, we headed back home.  Initially, I thought that they should all be somewhat flat.  Some people call these Cinderella pumpkins.  But there were some that looked really cool, and were anything but flat, so decided to use them in the totem anyway.  Besides the pumpkins, some re-rod and a drill with a really long drill bit were used.  Here are a few tips to make your Funky Pumpkin Totem.

Line the pumpkins from largest to smallest.  Remove the stems if they have any from all except for the top pumpkin.


Starting with the largest, place that one on the ground where you want your totem to permanently be.  Level it using your eye as a guide.  You may need to bury it in the ground a little.


Drill a hole in the center of the first pumpkin and drive a stake or piece of re-rod through it.  You want to have something strong enough to keep your pumpkins in line and prevent them from falling off of each other.


Stack the pumpkins, drilling a hole in each one, until you get it as tall as you want. 

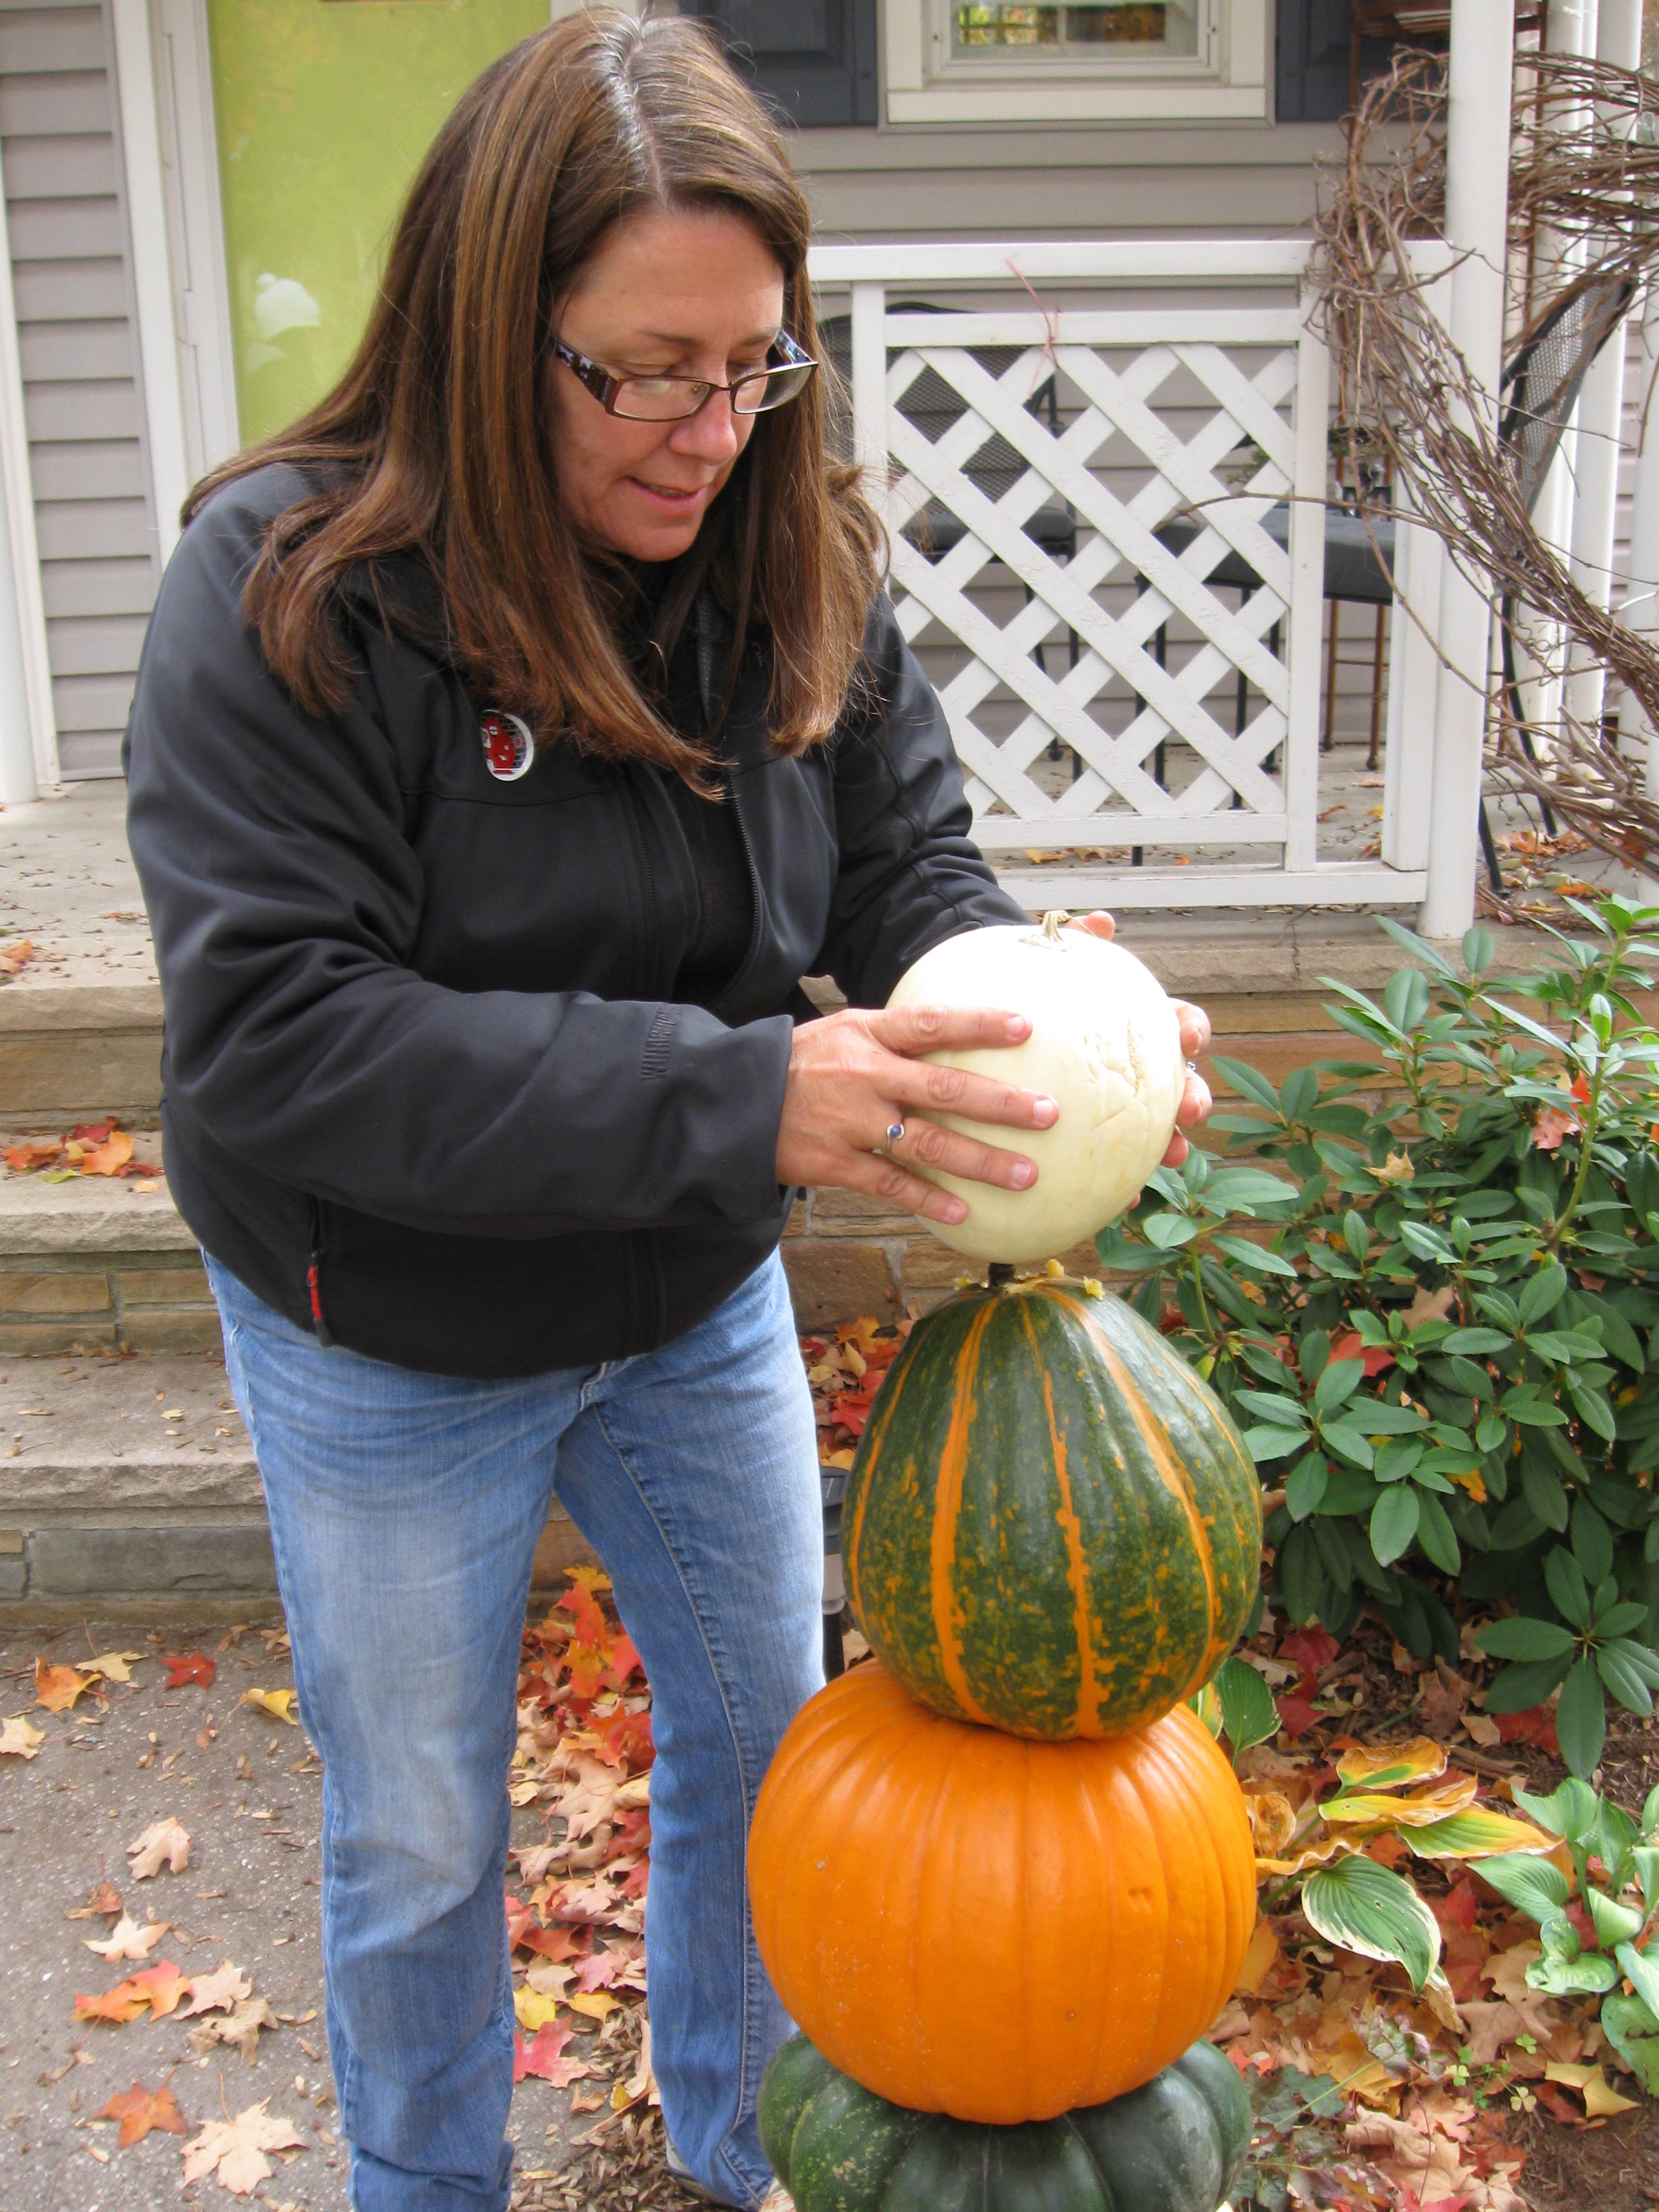
Now I have a starting point for my autumn decorating! 

No more decorating for today, it’s time to go indoors to eat some pumpkin muffins and drink some cider while I come up with my next outdoor project.  YUM!  Don’t you love October?

are we done gardening yet?

30 Sep

It is not in doing what you like,

but in liking what you do that is the secret to happiness.

Sir James M. Barrie

It is the last day of September and I have to admit, after gardening this past summer in the dust, I’m looking forward to a long cool autumn to re-energize my overheated body and sun-leathered skin. Some gardeners that I have talked to over the past few weeks said they gave up long ago on their gardens. “Too hot! Too dry! Maybe next year.” I detected slight sounds of guilt in their cracking, squeaking, high pitched voices. In the community garden I belong to, many people abandoned their garden over the summer. I’m so confused. How could anyone give up on gardening? I didn’t know that it ever ended. Could these just be the crazy thoughts of an obsessed gardener? There must be a devil and angel gardener on my shoulders. I’ll be the first to admit, I wanted to give up too, but something (or someone) kept me going. “Patti…you need to go out in the garden…you will know what to do when you get out there.” These were some of the whispers that would haunt my ears. Ok, alright! I would go out, and before I knew it, hours would pass. I lose track of time, and get lost in the many things that occur in this amazing world. For me, gardening is never done, and this is the best time of year to prep the garden for next year. Here are a few things to remember to do this autumn before you decide to hang up your shovel for the year.

  • Weed, weed, weed! Perennial weeds are growing like gangbusters and will spend the winter months sending their roots deeper into the soil. Make sure you remove all weeds! Annual weeds have flowered and set seed. You don’t want these to disperse in your garden. The key to eliminating weed problems is to clean, clean, clean!
  • Aerate the soil. This can be done with a spade or fork. Gently lifting the soil while weeding or adding amendments will be sufficient. You could also use a shovel, broadfork, or small tiller.
  • Amend the soil. Autumn is the best time to add bone meal, greensand, and rock phosphate which will improve soil fertility in a sustainable earth friendly way. Follow directions on the bag for amounts. You can find this in local garden centers and nurseries. Save composting for spring time.
  • If you experienced a drought this past growing season, it would help to water your garden. Hopefully we will get a good snow this year to help build the low soil water content.
  • Get your soil tested. Now is a good time to get your soil tested by your local county extension. This can also be done in the spring. Be consistent from year to year. If you have it done in the spring, then continue to do so.

So, to answer the question, “are we done gardening yet?”.

The answer from me is, “NEVER!”

Happy Autumn Gardening!

Garlic Anyone?

23 Sep

While shopping at your local farmers market, pick up few extra bulbs of garlic from your favorite organic farmer to plant at your urban farmscape.  Garlic is an easy plant to grow, and not only will you harvest your crop at the end of next summer; you will get a bonus crop of garlic scapes in the spring. 

Assorted Garlic and Scallions

Now is the time of year when I plant my garlic.  It grows best in nutrient poor, sandy-loamy soils.  I have grown it in full sun and this past year I grew it in part shade which did very well.  I harvested about late July, early August and after curing, saved what I thought to be the best to grow for next year. Basically, there are two types of garlic, hardneck varieties, and softneck.  The softneck varieties are used for making garlic braids.  Hardneck varieties will store longer.  You choose what you want to grow.  I grow mostly hardneck varieties.

I learned how to grow garlic when I grew over then varieties at my country farm after reading a book by Ron L. Engeland,  “Growing Great Garlic”.  You can get his book too, but for starters, here are some general steps to get your prepped for planting.

  1. Select firm, hard bulbs.  They should be free of damage or soft spots.  Bigger is not always better.
  2. “Pop” the cloves by holding the stem with one hand, turn while holding the bulb in the other.  If you are good,

    Single clove. Plant with the pointed part pointing upward to the sky.

    this should separate the cloves from the stem.

  3. Plant each clove about 2 inches below the top of the soil.  This year I planted the cloves about 4 inches apart.  The beds they were planted in were two feet by four feet, which was about nine clovers per square foot.  I planted four beds.  That was a little too much, but I do love garlic!
  4. Mulch with straw, about two inches thick. 
  5. Water through freezing temperatures.

In the spring you will begin to see garlic growing, and as soon as the weather warms up, it will grow many leaves.  Soon, a stem will rise from the center, and a pointed flower bud will form at the end of the stem.  This is called the “scape”.  When in curls, you know it is time to remove it.  These scapes are delicious when sautéed in some butter. With their mild garlic flavor, this is a real spring treat.  Allow the garlic to continue to grow until later in the summer.  You should then allow the soil to dry out, and as the leaves begin to turn yellow and dry, you know it will soon be time to harvest.  Ron says in his book to harvest the hardneck varieties when only 5 leaves remain.  The softneck varieties can dry a little more. 

Scapes…YUM!

Follow these general steps for harvesting and storage:

  1. Harvest after about half of the leaves dry out.  Brush off soil, do not wash.
  2. Tie together in bunches and hang in a dry, airy, shaded location, such as a garage or car port. 
  3. Allow to cure for at least two weeks.
  4. Clean garlic by removing dirt and the outer most paper.  Each papers are dry leaves.  If the papers are thin, or few, and the cloves have separated, use these for cooking first as they won’t store very well. 
  5. Cut stem and roots.
  6. Store in a cool dry location.  I have kept garlic in my kitchen cupboards where I keep other herbs and spices. 
  7. Save your best bulbs to plant in the fall.

Beautiful and probably tasty. I’ll save this one for planting.

It’s worth dedicating a little space in your urban farmscape for garlic, or even try other edible bulbs like scallions .  You will find that they are easy to grow, and that the most flavorful garlic will come from the unique varieties that you grow.  One of my favorites was given to me by a friend years ago, and I have been growing it ever since.  I don’t know anything other than it is a hardneck variety, similar to  Chesnok Red or Music.  Deliciososo!  A one-time small investment by you and then shared each year as a gift to friends will provide you with a lifetime of garlic and happy friends.  I am going to pickle some garlic this year for the first time.  Anyone have a good recipe they would be willing to share?

Building a Cold Frame

16 Sep

I was driving around northern Michigan today and noticed some of the leaves starting to change color. Then I realized that with the first frost date rapidly approaching, it was time to think about protecting my garden. Plants such as basil and peppers won’t tolerate temperatures below 50 degrees Fahrenheit let alone a frost. I suddenly felt the urgent need to harvest everything before it was too late.

You can extend your growing season long into the fall, maybe into winter in a small unheated greenhouse or cold frame for some crops such as carrots, beets, spinach and arugula. Remember how early spring came? I got so tired of covering and uncovering plants. Hot, cold, hot cold. Well, nighttime temperatures are what you need to pay close attention to now, and the covering and uncovering is about to start again. If it is going to dip down below that magic 50 degrees, protect your warm season vegetables like tomatoes which can tolerate an occasional dip, but then you will start to notice how the fruits stop maturing and they aren’t turning red. Best to pick them and make some fried green tomatoes. If you want to seriously continue to garden and save what you can, you can build a simple cold frame. WARNING!!! You can now cook your cool season crops on a sunny day. So not only do you need to keep them warm at night, you need to keep them cool on a sunny day. For now, protect with newspaper or lightweight fabric such as a frost cloth which is available from Johnny’s Selected Seeds. Protect this way on these occasional frosty nights, and prepare for colder temperatures by building a simple cold frame like I did here.

I cut 1/2 inch PVC pipes 10 feet long. Since my beds are raised it was easy to push them into the ground on one side. The bed that I am working on is 4 feet by 8 feet. I have equally spaced 5 PVC pipes (you only see part of it here).

I bent the PVC around and pushed into the ground on the opposite side of the bed.

I secured the PVC to the inside of the raised bed using this galvanized piece.

Then I used zip ties to secure an 8 foot pipe to the top. I would recommend adding a screw to prevent it from sliding down the sides.

Cover with poly. Here I used a horticultural grade poly that I had left over from a greenhouse we built at our farm. You can buy this at greenhouse supply companies or catalogs like Farm-Tek. More light penetrates, which is important for plant growth and development.

Notice how transparent it is.

This was an inexpensive alternative using painters plastic from the hardware.

For finishing touches, you can use scrap pieces of wood screwed to the bed frame to secure the poly at the bottoms. I used pink foam insulation pieces for the ends to make it easier to remove on sunny days to prevent the temperatures from getting too high.

This was the simplest and most inexpensive way that I came up with to make a cold frame. There are many other options to explore whether you want to protect your crops, extend your season, or get a jump on next year. Click on the Grow Veg link to the right, or below on the links to go to Amazon for my favorite books to learn more. Or the last link to a Juwel Cold Frame like the one you see in the background of the above picture. This is one of my favorite cold frames. Just ignore the snow for now. We still have a lot of time before that gets here.

Four-Season Harvest: Organic Vegetables from Your Home Garden All Year Long

The Year-Round Vegetable Gardener: How to Grow Your Own Food 365 Days a Year, No Matter Where You Live

Juwel Cold Frame 1000

Garden Preservation

9 Sep

Labor Day has passed and the gardens are producing at their peak.  I’m sure that you have been enjoying cucumbers, peppers, beans, herbs, tomatoes and egg plants from your urban farmscape.  What a healthy time of year!  Food prices are at their lowest at the market.  It is so easy to buy bushels of fresh seasonal veggies and fruits.  I know that you aren’t thinking about winter, but if you want to enjoy some of these summer pleasures this winter, you should think about food preservation now.

 The three main ways to preserve food are by drying, freezing and canning.  Herbs are easiest in that you can just dry them in a dry shady location and then seal in a jar.  Freezing works best for some fruits and veggies, but canning may be the best method for longer preservation.  For high acid foods, like tomatoes and pickles, you would use a Boiling-Water Canner.  For low acid foods you would need to use a Steam-Pressure Canner. 

 I learned how to can tomatoes by watching my mom.  As the youngest in a family of three, and living in the country, I was usually a helper in the kitchen.  I remember my mom filling the stainless steel sink with fresh picked tomatoes and pouring boiling water over them.  The steam would rise above the bright red orbs and mom would carefully pluck them from the water and while using her paring knife she would remove the core and peel off the skin, quarter the tomato, then drop the pieces into a glass quart jar.  Once full, she would place the long handle of a wooden spoon into the jar of flesh and seeds, moving it around the edges to release the tiny bubbles locked in the bottom of the jar.  She would wipe the rim of the jar and then it was time for my job.  I would carefully measure salt into the worn metal measuring spoon and pour it on top of the tomatoes, watching the crystal substance disappear into the liquid.  Mom would remove the gold lids from a shallow pan of boiling water and after placing them on top of the jar she would  tighten them with a gold metal band.  After placing them into the metal rack lining the inside of the big blue pot, she would lower them into the boiling water and set the timer by pushing in and turning the small black knob that was next to the clock on the stove.  After processing, my mother would lift them out of the boiling pot and place them on a wooden cutting board.  We would begin to hear the lids “pop” as the suction forced them inward to seal.  Mom would say “there goes another one!”  When cooled, we would stock the jars in the cupboard in the basement.  The shelves would be filled with not only tomatoes, but pickles, applesauce, peaches and pears.

If you have never canned before, I would recommend starting with tomatoes.  It is really simple to do.  And in January when the snow is flying, the best meal to make is from your tomatoes.  Those along with using some fresh dried herbs will bring you back to this summer as you harvested and preserved the veggies from your garden, or maybe your visit to the farmers market.  It’s fun when you turn it into a family event, or invite some friends over.   Once you learn the process, you may be on the way to creating your own family secret recipes that you share at the holidays or sell at the market!

To learn more about canning, you just need a book.  I recommend any of these.  Click on them to go right to Amazon.

Ball Complete Book of Home Preserving

The Big Book of Preserving the Harvest: 150 Recipes for Freezing, Canning, Drying and Pickling Fruits and Vegetables

Canning and Preserving For Dummies

Sunflower S-M-I-L-E

2 Sep

I have never met a sunflower I didn’t like.  Have you?  Honestly, don’t they make you S-M-I-L-E ?  They are so easy to grow.  And I’m sure if you feed birds, you have witnessed the sunflower that was randomly “planted” next to the bird feeder.  They are so easy to grow.  Even when I go to the farmers market I can still find some to buy.  The farmer I buy mine from each week sells sunflowers at 3 for $1.00.  So, for 33.333333333 cents each, I can afford to pass them out to friends and co-workers.  Then I get to watch them S-M-I-L-E .  Did you know that the heirloom sunflower “Mammoth” can grow ten to twelve feet tall?  And have heads that could possibly stretch up to twelve inches across?  This is the biggest sunflower out there.  And the best part is, if you grow one, you will never have to buy seed again.  WHAT?!!?!  I have been growing this sunflower for many, many years, and save one of the heads each year, and have hundreds of seeds.  I have so many seeds, that I am going to send some to you if you are one of the first 25 readers to like or share this post.  Really.  I want to share the Sunflower S-M-I-L-E and then you can grow some and share them with your friends too.  Don’t worry about the size, they are perfect for an urban farmscape.  I fell in love with them when I first grew them at my farm.  I planted a 10 x 10 space in a small culinary garden.  They are tall, and I didn’t have much room, but I decided to try them anyway.   Don’t be surprised if they are the center of attention in your garden. 

How to save seeds from your sunflower.

  • First, the outer petals will start to dry up.  You will be able to see the seeds when the flowers begin to fall off. 
  • If the birds start eating the seeds, you know for sure it’s time to harvest. 
  • After harvesting the flower, place in a warm dry location to dry completely.  Keep the heads whole if you like and use as bird feeders or for crafts. 
  • Sunflower seeds are really hard to remove.  If you want to remove them from the head, take two seed heads and rub them together.  Wear gloves as the stem may have small sliver type pieces that could irritate your skin. Once a few seeds begin to dislodge, it will get easier.
  • You will end up with some seeds mixed with some dried plant material.  Clean the remaining seeds from the plant debris and then store in a cool dry location in a paper bag or paper envelope. 
  • You can feed the birds, feed yourself, or even make crafts with sunflowers.  


Here’s what I made this weekend while camping from a sunflower head using florists wire and picks, and some dried flowers and items found in nature. 

Step 1:  First I used some floral picks to wrap wire around pine cones.  Set aside to use later.


Step 2:  Next, I arranged some dried flowers across the lower portion of a grapevine wreath.


Step 3:  Wire the dried flowers to the wreath using floral wire.  Trim stems.


Step 4:  I used floral wire to attach this sunflower head to the wreath, covering the stems of the dried flowers.


Step 5:  Here I inserted some fresh-cut hydrangeas as“filler”.  These will dry, and still look nice. 


For the finishing touches, I hung it up and then placed in the pinecones where I felt they were needed.  I like to look at it a bit.  Then while out on a walk, I picked some ferns and used them.  They will get curly and brown, and might not look as good as the others, but for now, I liked it! 


I’m sure that if you haven’t grown sunflowers before, you will want to grow them next year.  So if you want some free Sunflower “Mammoth” seeds, this is what you need to do, it’s easy, and it will make a lot of people S-M-I-L-E !

  1. “Like” or “Share” this post using any of the sharing buttons below to get a packet of 10 seeds.  Only the first 25 people to do so will get seeds.  So hurry!
  2. Next, send me an e-mail to request your seeds (I need the address to mail them too.  Don’t worry, I won’t keep, share, or use your address in any other way than to send you your seeds.  patti@myurbanfarmscape.com 
  3. I will pay for the postage!  Hooray! 
  4. You will receive your seeds with planting instructions, let’s say, within ten business days of requesting, at which time, you will experience a small smile 🙂


Cuttings From the Garden

26 Aug

This time of year is one of my favorites in the flower garden.  The nights are starting too cool and the blooms are presenting their luscious hues of vibrant pinks and oranges with a backdrop of foliage showing many shades of green.  Now is the time when you reap the rewards from all of the hard work of planning, planting, and weeding.  It’s hard to think that the weather will soon be changing and the cooler days of autumn will be upon us.  Now is the time to decide which cuttings to take from the garden for indoor growing through the winter.  One of the easiest plants to do this with is Coleus.  You don’t want to dig up the plant due to a soil organism that doesn’t allow Coleus to successfully grow indoors.  I started these from seed last Thanksgiving, and I think that I will take some cuttings this year.   With its colorful foliage, ease of rooting and low light requirements, it makes an ideal garden plant to grow indoors.  With its sturdy, strong square stem (a clue that it is a member of the mint family) it can easily be handled.   You can root Coleus in a small clear vase in water if you choose, and by following these easy steps you can ensure successful propagation.


  1. Choose a time to take cuttings when the plant is under less stress, such as the morning.  Select only healthy vigorous plants to take cuttings from.


  1. Prepare containers filling them with a good quality potting mix for houseplants.  Any size less than 2 inches in diameter works well.  Water thoroughly. Or if you choose, use a small vase and root first in water.


  1. Cut the stems about 3 inches long from the top.  You should make the cut just above where a set of leaves are present.  That way the parent plant will still continue to grow fuller and more attractively.


  1. Remove all lower leaves only to leave 2-3 left on the tip.  If any flower is present, remove.


  1. Create a hole in the potting mix (a pencil works well for this) and place the cutting into the hole.  Move some of the potting mix around the stem so it stands up.  Water and place in a bright but shaded spot out of direct sunlight. 


  1. Continue to water only when the potting mix starts to dry out.  Do not allow to become completely dry or to over water and become soggy. 


  1. Once roots have formed either in the vase or in the potting mix, transplant into a small decorative container.  Keep in a morning sunny window and enjoy throughout the winter months ahead.  You can then plant it back out in the garden next spring after danger of frost.  Enjoy!

My Urban Market Salsa

19 Aug


I love the fresh summer veggies right now.  Take this salsa recipe for starters.  It has EVERYTHING  you need for a meal.  I’m warning you, when you make it, you will probably think it’s an appetizer, but once you start to eat it, it will turn into a meal because it tastes so good and it is so full of fresh garden flavors.  It also provides something from every food group! You probably aren’t able to grow everything for My Urban Market Salsa so you will have to pick up the remaining ingredients at your local market, which is why I don’t call it My Urban Farmscape Salsa. I can’t grow everything, but I can grow most of it, and hopefully you do too. 

1 cup cooked, cooled and rinsed black beans

1 cup sweet corn, cooked, cooled, and cut off the cob

1 cup diced tomato

½ cup diced sweet red pepper

¼ cup seeded and diced jalapeno pepper

½ cup finely shredded cheddar cheese

½ cup diced onion

2 tablespoons chopped parsley

2 tablespoons olive oil

2 tablespoons lemon or lime juice

2 teaspoons minced fresh garlic or 1 teaspoon garlic powder

1 teaspoon cumin

 Mix above ingredients and place in the refrigerator overnight.  Serve the following day with tortilla chips.  My favorite are the blue corn tortilla chips.  Or for lunch, serve in a homemade flour tortilla.    Bon Appetit !

Pepper Harvesting and Preservation

12 Aug

One of my favorite crops to grow in My Urban Farmscape is peppers. You can get a lot of bang for your buck out of these compact plants.   Historically, peppers have been used throughout the world to flavor some of our favorite dishes with their crisp, tangy, sweetness or their hot, spicy, heat.  Think about it.  What would chili be without the pepper?  How boring would your veggie trays look at the summer picnic without a bright orange, yellow or green bell pepper?  Would tacos or fajitas exist?

Sweet Peppers

I have started to pick sweet peppers and I’m sure that you will soon if you haven’t started already.  As I begin to get an overabundance, I will share some, but I will also freeze or grill them.  For bell peppers, you harvest them when they are ripe, which is when they reach their mature size.  They will feel heavier and may start to turn color.  As you gently pull, twist the stem.  Or use scissors or pruners and cut the stem about 1/2” from the fruit.  For the colored bell peppers, wait until they turn their color (yellow, orange or red). 

Freezing Bell Peppers

It’s simple.  Slice the pepper in half, stem to blossom end.  Remove the stem and seeds inside.  Wash, and dry.  Place in a freezer bag or freezer container and toss into the freezer.  Use for cooked dishes.  They get soft once frozen so they won’t work well for fresh eating.

Roasting Sweet Peppers

Also easy.  These larger red sweet peppers give just the right flavor to some otherwise boring soups or stews.  Cook these directly on the grill or over an open flame on your gas stove.  You could also use the broiler in your oven. As they cook they will get soft and their skin will char, that is when you know they are done.  Remove from the grill and allow to cool some making it easier to handle when you remove the skin.  After the stems and skin are removed, chop and place in a freezer container what ever you don’t use. Yum!

 Hot Peppers

For hot peppers, most of them can be harvested in the green stages up to their colored stage.  These will be ready for harvest later in the season as they LOVE the heat.  Of course you can use any of the hot peppers fresh however you like.  

Freezing or Jam

You can freeze jalapeno peppers like bell peppers, removing the seeds.  WEAR GLOVES!  One of my favorite things to do with jalapeno peppers is to make pepper jelly.  The recipe I have used is on the Sure-jell box.  I like to spread this over some cream cheese and serve with crackers.  Secret: Want to give it a little more bite?  Leave in the seeds.  Watch out though if you take some for a holiday gathering and grandma tries some.  She might scream out some words you have never heard from her before.  Most grandma’s don’t  like hot spicy foods!

Drying Peppers

You can dry all chili types.  I like these to turn red on the vine.  You can spread them out over a screen, string up on fishing line or heavy thread, or use a dehydrator.  It’s fun to make decorative gifts or ristras.  Once you know they are dry, you can grind them in a coffee grinder, not used for coffee of course, but just for your peppers, and then store in a glass container.  These make nice gifts, and who knows, maybe you could come up with your very own famous chili spice mix!  I love peppers.  How about you?  What is your favorite way to preserve peppers?

Inspiraton from the Paper Towel

5 Aug

I would like to think that I live my life spontaneously.  Not as spontaneous as I would like, but enough so that sometimes I don’t know where my day will lead me.  When I started this blog, my intent was to write about organic gardening in small spaces, which for today, is at My Urban Farmscape.  I told myself that I would have loads of information to share with others.  And I do, but sometimes I have no idea when I wake up in the morning what I will write.  Maybe this is procrastination, but I like to call it spontaneity.  This morning I had thoughts of sharing how to make a garlic braid, or maybe how to dry herbs.  It felt forced, and being a spontaneous personality, well, it seemed dreadful.  What I really wanted to do was to get outside  as this is the first cool day in a string of long hot dry ones.  I was thinking that once I got outside I would find my inspiration, and come up with my topic for today’s blog.   I then worried that once I got outside, it might be hard getting back inside to write.  Todays dilemma.

During breakfast, my husband asked, “Where did you get the paper towels with garden sayings?” 

“I think they were in the mega pack, I didn’t even realize it.”

He read out loud, “No two gardens are the same.”

The thoughts in my head were suddenly filled with flashes of gardens that I have experienced in my life.  I replied with a chuckle, “Wow, that’s true, I never knew paper towels could be so inspiring.”  And with that, I grabbed my coffee and headed upstairs to my computer.  I decided to share with you  my garden inspirations for today, brought to you today by Bounty (could I get a paid endorsement for this?)


The flowers of all tomorrow are the seeds of today.


You can bury a lot of troubles digging in the dirt.


Gardening is a way of showing you believe in tomorrow.


Friends are flowers in a life’s garden.

Now that I have posted this, I will be going outside to strip the dried peppermint leaves off of their stems and place in a jar to save for tea.  I need to catch up with some weeding, and soon I’ll share with you more about harvesting and preservation in a later post.  This is the plan, but when I get in the garden, I have no idea where the day will go, I just know that I need to get out there.  As always, I welcome suggestions for topics from you.  Enjoy your day!